Setting up for home working can be broken down into a several phases (phased sections coming soon). For now, there is a step by step installation guide below. Please see this page if you have an Apple Mac.
Some General Notes, preparation and prerequisites
- You need a computer running Windows 10 Pro and with Microsoft Office Installed. You need to know some basic computer operations like running software and loading websites etc.
- If you run into difficulties with accessing websites (particularly NHS websites) use Internet Explorer.
- However, for video consultations you will need to use a newer browser like Edge, Chrome or Firefox.
- Remember to install 32bit version for 32 windows and 64bit for 64 bit windows.
- You can check by clicking on the start menu and typing “about your pc”.
- You will need your EMISWeb CDB code (the number that appears when you normally log onto EMISWeb).
- You will need your EMISWeb username and password to activate the 3rd party APIs that allow things to integrate with EMISWeb – you may only one shot when these pop ups appear so please have your correct username and password ready.
- The first time you log onto Docman you will need your practice ODS Code, your Docman Username and Password.
- You will also need the email you set up AccuRx with and the Password.
1. Activating You N3/HSCN Token
The instructions for this will be provided by your token provider. We are hoping to provide Egton tokens and the instructions for these are available here: https://support.egton.net/support-centre/n3-connect-initial-setup/
You can follow those instructions all the way to installing and activating the VPN – in which case skip to step 4. Otherwise activate the token then follow these instructions.
2. Install Cisco Anyconnect Software
The Cisco Annyconnect software has been updated. The latest version can be found here. Or you can download direct from EMIS from here.

Choose save

Then when downloaded click open folder
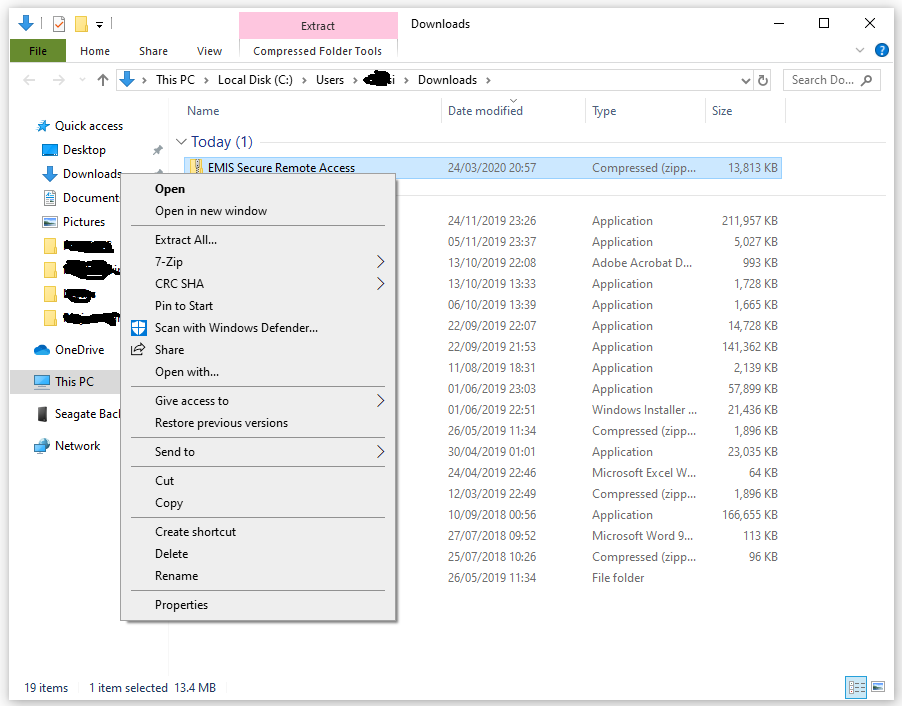
Right click on the file and select extract all

Click Extract. The extracted files should appear as below:

Then double click on the Install-emis-Secure-Remote-Access file.
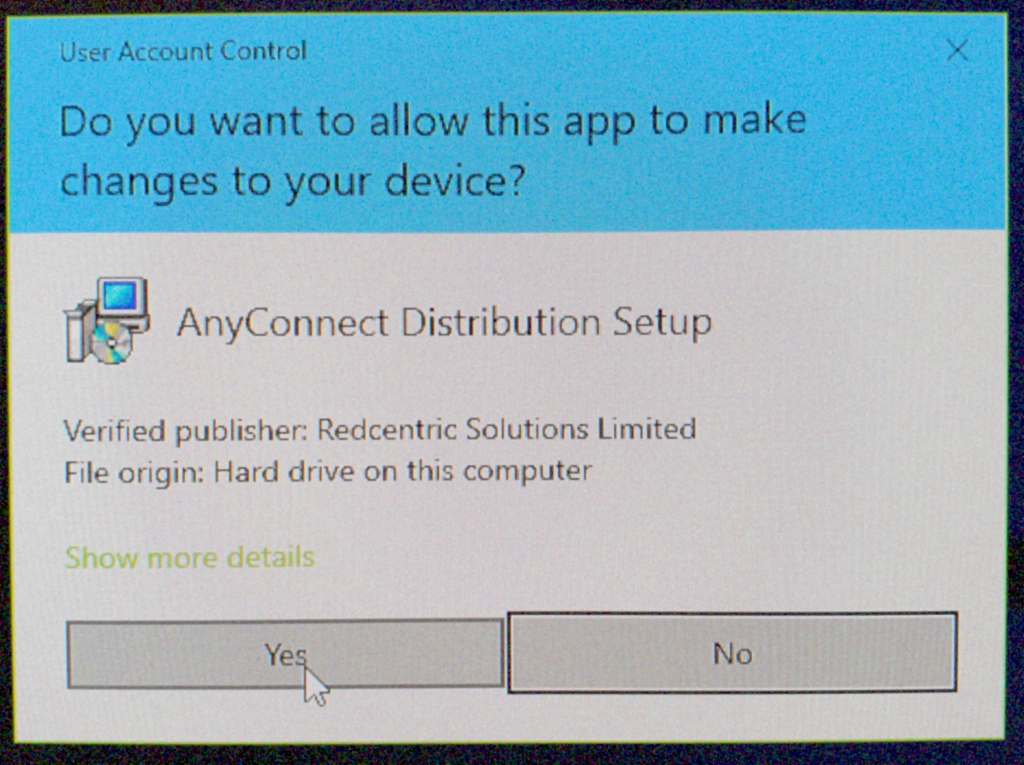
Click Yes
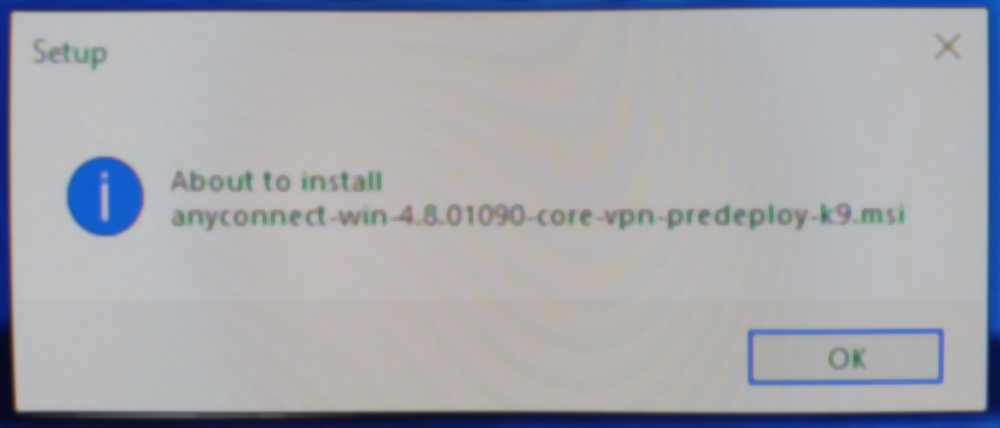
Click OK

Click Install

All the installer to complete that step.

Click Next

At this point you may be asked to allow the system to stop a component that needs upgrading. Approve that and click OK.

Click through the options to proceed, next, agree, install etc. Once complete click the finish button.
3. Activate the VPN
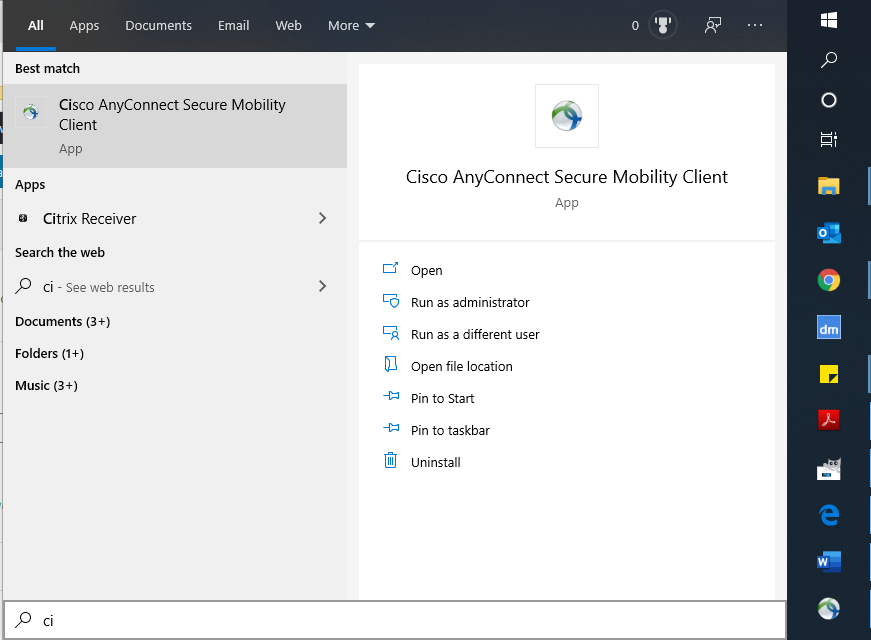
Next you have to load the Cisco software from the Start menu. Click your Windows/start button and run the software you just installed. Its called ‘Cisco AnyConnect Secure Mobility Client’.
Then you may need to get the pop up to appear. If the ‘Cisco Anyconnect Secure Mobility Client” pop up is not showing, go to you notification area of your task bar. It should be the bottom right of your screen. If not showing you may need to click the upward arrow. Amongst the little icons find the one indicated by the red arrow below. The first time you log onto it you may show a blank address bar. Click the drop down and select ’emis Secure Remote Access’ indicated by the blue arrow below.

Click connect and another pop will ask for you username and password. Your username will have been sent to you when you activated your token – you username should be in the format: your CDB code, followed by your initial and your surname then @egton. It should look like: 12345asurname@egton.
Your password will be the code you set up followed by the number shown on token/fob when you press the button. Then click ok.

Click accept when connected.
4. Install EMIS Health Installer
Download and install the EMIS Health Installer below:
Instructions provided by EMIS are available here.
Essentially run the software and follow all the steps through. On the first screen below put your organisation code in and leave as client. Click Install and allow it all to complete, then click Launch and install – see the images below.


5. Install EMISWeb and related Components
You will be presented with the EMIS Health Product Manger. Click on ‘Check for product updates’ if updated hasn’t already started.
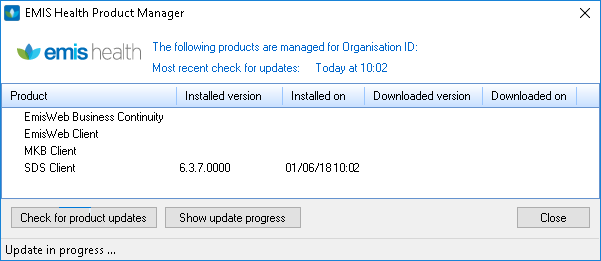
Allow this to run whilst you move to step 6 as it can take a while.
6. dot NET
.NET is a component of Windows and may already be installed.
Go to the start Menu and type in “turn windows features on or off”.

When it launches please ensure the radio button next to the ‘.NET Framework 3.5’ option is selected. If it isn’t already selected like image below, please select it by clicking the square radio button next to text – as shown in the second image below.

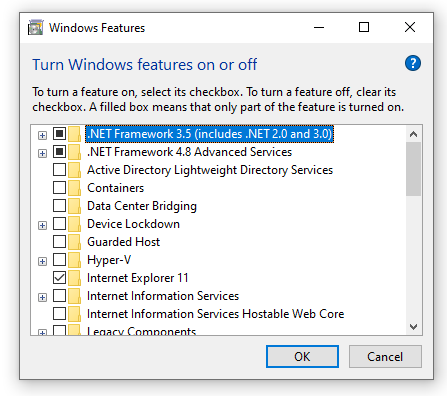
Click OK and the Then click “Let windows download and install components” and allow the process to complete.
7. Install Gemalto Middleware
Please download the appropriate version below and run the installer. Please select the appropriate one for your computer by clicking on the appropriate text from the two options below. No need to change any default entries or settings, just click to proceed all the way through.
For 64 Bit Computers install the 64 bit Version of Gemalto below:
For 32 Bit Computers install the 32 bit Version of Gemalto below:
8. Install Identity Agent
Please download the identity agent software from the link below:
Once downloaded, please run the installer and just follow all the steps through until the process completes.
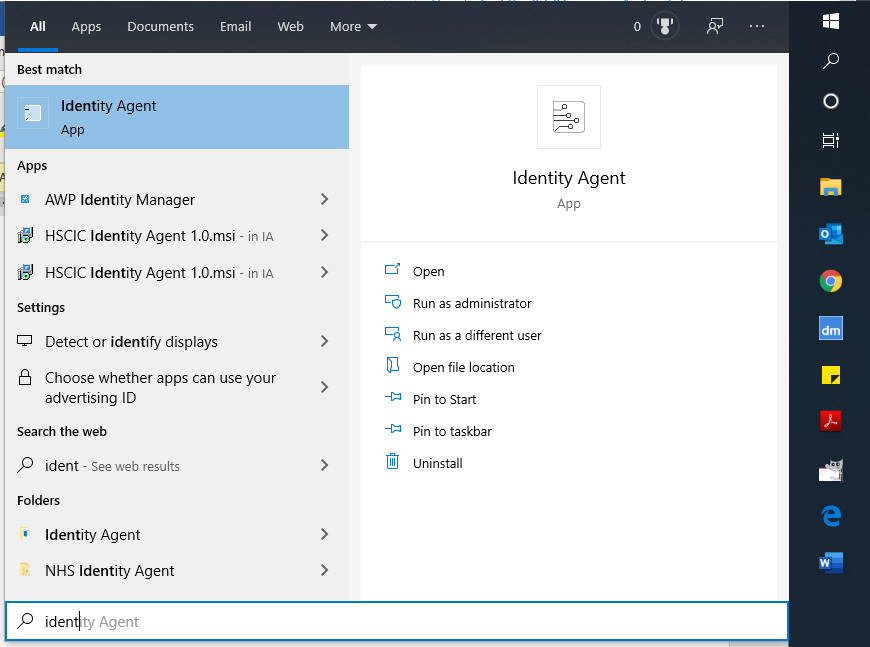
9. Run Identity Agent
Click the Start button and find the identity agent and run it.
10. Smart Card Reader
Plug your smart card reader into a USB port. The drivers for this should install themselves. The CCG provided smart card readers should do this and most other ones should do the same. However please read the instructions that came with the reader if there seems to be problem when you put your smart card in.
[COVID 19 Tip – If you haven’t got a Smart Card reader – you could borrow the Keyboard from work with the card reader in it for the time being as people are being forced to remote work. Don’t forget to return it though]
11. Smart Card
Put your smart card into the card reader and allow Windows to do its thing. You should get a message saying your card is ready to use and Identity agent should pop up asking for your pin number. Log on to the smart card as you would normally
12. EMISWeb
Go back to the EMIS Health Product Manager.

EMIS Web should have managed to install by now. If it hasn’t you may have to go make a cup of coffee or something. When it has finished there should be an EMIS Web icon on your desktop:

Double click on that icon. EMIS web should then load up. If it doesn’t then you can try to double click on the text that says “EMISWeb Client” in the product manager window.
If you still are not getting EMIS to load, please ensure all the updates are actually complete and you may wish to restart your computer and try loading EMIS Web again. But you will need to activate the VPN again before you do as in step 3. above.
13. Docman
Download and install the DocmanDestopServices file below:
Nothing will appear to load up.
Then open a browser and go to https://production.docman.thirdparty.nhs.uk/
Log on to Docman using your practice code alongside your username and password. You shouldn’t have to do this the next time you load Docman.
You may get an EMIS pop up asking you to activate a product. Please put your username and password for EMISWeb in that pop up.
Optional: if you want to see the Docman Toolbar, right click on the ‘Docman Desktop App’ in the notification area of your taskbar and click ‘show toolbar’.
14. AccuRx
Download the AccuRx Installer from here.
Run the file once downloaded and follow the steps through to get it installed. If you or others already use it at practice then you shouldn’t need to the bits about changing settings in EMIS. If you don’t already use it then you may need to make changes in EMIS. It is probably best to ask one of the admin/managers who normally deal with these things to do that.
Clicking through all the stages you will be asked for your email address and password for AccuRx. Please enter it and log on. If you haven’t got one please register but someone will need to approve you for your practice.
Again you may be asked to activate this product. If you are then you need to use your EMIS credentials to do that.
Allow any updates to complete.
That’s All Folks
That should get you up and running.
ICE doesn’t work in this method, but you can add the instruction for tests and the clinical information in a consultation for someone with a laptop or cloud pc access to add the request via ICE.
We will add more information in due course to the other sections of this website. But for now you can get information on video consultations for:
EMIS/Egton Video consultations from here: https://www.egton.net/all-services/video-consult/
AccuRx Video Consultation from here: https://support.accurx.com/en/collections/2195339-video-consultations